The old mantle that surrounds the wood-burning fireplace in my small living room isn’t the prettiest part of my house. And as a result, I like to jazz up the look of it with a hanging banner or bunting when the occasion allows.
I have a fun pom pom banner in deep orange, red and yellow that’s strung up from the end of September until sometime in November, when I swap it out for little cloth bags that hold our advent activities in December. In January, 75% of my four-person family celebrates a birthday’so in that month we keep the party bunting hanging until February, when it gets swapped for the little vintage linen hearts that hang from the faux branches in the vase that sits on the top of the hearth.
Now, don’t go thinking I’m hand-sewing these adornments, or spending an obscene amount of time on them, because really, who has time for that? Instead, I like to make a no-sew banner using inexpensive felt from the craft store, choosing the colours that work best for me. Felt is a great option because it’s easy to work with, doesn’t fray and keeps its neat edges for a nicer look.
For the birthdays, I’ve been using the same one for years. It’s gender-neutral, livens up our space during the dreary days of January and hangs in the kitchen or office the rest of the year, where I spend most of my working hours.
Here’s how to make your own celebration banners, should you be interested. Feel free to use colours that correspond to a particular season, or instead of cutting triangles, you can use apples and pumpkins in the fall, snowflakes or snowman in the winter and bunnies in the spring.
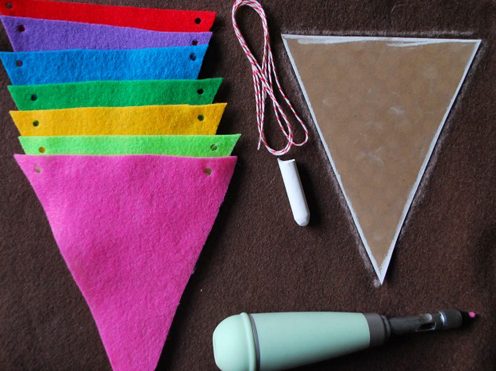
You’ll Need:
- Felt
- Template of desired shape
- Hole punch
- Scissors/craft knife
- Twine, baker’s twine, string or ribbon
How to Make It:
- Draw or print your desired shape onto cardstock and cut it out using a sharp craft knife or scissors.
- Trace the shape onto the felt with chalk or pencil and cut out.
- Using the hole punch, cut two small holes at the top of your shape and string together using the twine.
Tagged under: Birthdays,holidays,diy,party decor,hanging banners,bunting
Category: No Category