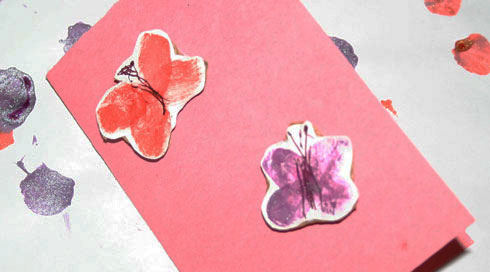
You’ll Need:
- Coloured construction paper
- Fingerpaint (or washable markers)
- White paper
- Scissors
- Craft glue
- Thicker cardboard (optional—an old pizza box works well)
- Black pen
How to Make:
- Create a ‘craft station’ (read: kid-friendly covered table) and put the materials around with the exception of the scissors.
- Make sure your child’s hands are clean. Let your child dip their thumb or index finger in the paint (or colour it with the marker) and press it onto the white paper. Hold down firmly for a few seconds to make sure the paint sticks well.
- Repeat the process, only when you press it down again, form a heart shape by having the second fingerprint overlap the first at the bottom. If you want to only form hearts, stop here and create a few different fingerprint hearts. If you’d like to create ‘heart butterflies’ click on.
- Flip the paper over and do the same thing, connecting the bottom of the second ‘heart’ to the first.
- Using the black pen, create the body of the butterfly and the antenna.
- Cut the butterflies out from the white paper, then glue them on to the cardboard (or directly onto the construction paper if you want to skip the pop-up process).
- Once dried on the cardboard, cut out the butterflies again and stick the cardboard onto the construction paper card.
- Let dry and then write out your message of love!
Good to Know: Kids can get creative with their fingerprint pictures—they don’t have to be classic hearts. The simple fact that the fingerprint is the main focus shows some serious love.


Tagged under: Valentine’s day,valentine's day cards
Category: valentines-day


